Showing posts with label dessert. Show all posts

Saturday, October 30, 2010

An adventure in firsts:

A few weeks ago, I got some apples in my CSA box. My initial reaction was to buy caramel sauce, and make a lovely snack to take to work with me. Sadly, I couldn't find any caramel sauce in stores whose first ingredient WASN'T high fructose corn syrup, which I try to avoid.

So I said to myself, hmmm. I've been cooking a lot lately... trying new things... I'm sure it's not that hard ... I'll just make some myself! So, I bought some brown sugar and went home to find a recipe.

I quickly found out that contrary to what I originally thought ... caramel sauce is not made of brown sugar.

So I scratched that, went to Epicurious (which is my favorite), got out my sugar jar and assembled the rest of the ingredients.


It's pretty simple. Water, sugar, cream, and butter.

And here's what you do:

Stir 1 1/2 c. sugar and 1/2 cup water in heavy, large saucepan over medium-low heat until sugar dissolves.


Then you increase the heat (I went somewhere between med-hi and high), and boil without until the syrup turns a golden amber color (around 12 or so minutes, maybe a little less.) (This is modified from the original recipe, which called for deep amber. The comments suggested that you stick with golden. It was a good idea.) You can occasionally brush down the sides of the pan with a pastry brush, if needed, and swirl the pan to mix.

Just boiling...

Starting to turn...

And this is the color I stopped at.

Remove from heat, whisk in butter. (I stirred rather than whisked, and that may have been a bad idea.)


Gradually add cream (mixture will bubble vigorously), and stir over low heat until smooth. Cool to lukewarm before serving.


When I stirred, I couldn't get it completely smooth - a big clump of sugar stuck to the spoon, but I figured it would be okay. I was right.

Yummy bowl of caramel!

So then I ate my little snack of apples with caramel sauce - and was disappointed. The sauce was way too delicate for raw, tart apples. So I decided - I needed to make a pie.

I had a spare refrigerated crust that needed to be used. I know it's lazy, but I really didn't have 2 or 3 hours to make one, and I wanted a quick and easy pie.

Now here's the "first" part: I didn't use a recipe. Once again - I figured, I've been cooking/baking a lot, I've made apple pies before, how hard can it be? So I made a pie (but not the crust) from scratch.

I used about 4 apples, thinly sliced, and put them in the crust. Dumbly, I didn't think to add the sugar and spices before, so I just sort of mixed it all up in the crust before baking it. I used probably 1/2 c. sugar, maybe a tsp. of cinnamon, maybe more, and a shake or two of nutmeg. Then I cut up some butter and dotted it all over the apples. I baked it (I think) at like 375 for about 30 minutes or so? I honestly don't remember.

And here it is:


By all means, it was not the best apple pie I've ever had. It was incredibly simple, and could have been a little wetter. But it was PERFECT with the caramel sauce. The simplicity of the pie was perfect with the sweetness of the sauce, and it was a delightful little snack. And, I was pretty proud of myself for not using a recipe.

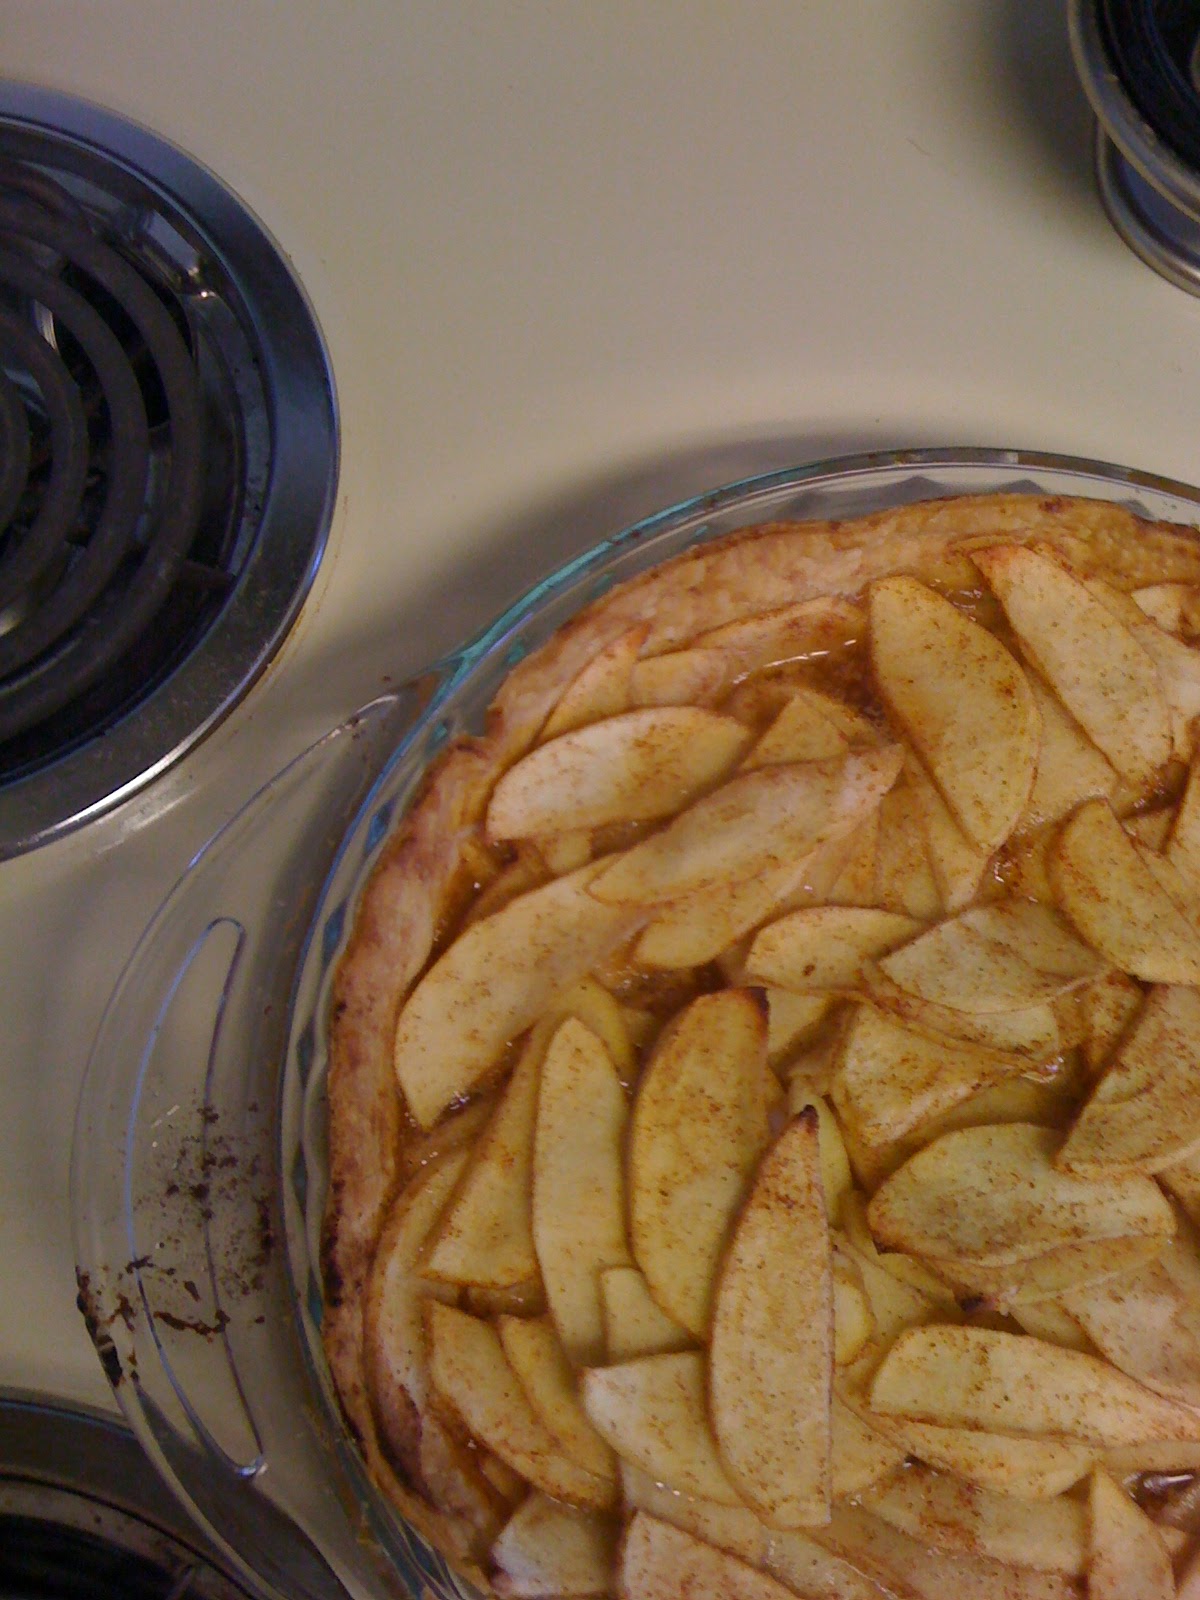
I'm getting braver in the kitchen. It's a bit scary sometimes, and I get nervous before seeing (and tasting) the final product. But I'm growing and stretching and usually the food is good and we are pleased. And it makes me happy :)

Saturday, October 16, 2010

Pudding is good to make when you're stressed.

I'm a terrible food blogger. You know how I said I was going to make pictures this time when I made that sweet potato ravioli? Well ... I was in a hurry, trying to get it done fast cause we were all hungry (and it isn't something that gets done very fast ... I started the process at 5:30, and we ate at 8 I think.) When I'm stressed about food, taking pictures of it is the last thing on my mind. So I apologize.

So instead of sweet potato ravioli, I'm doing pudding today.

Mark had his wisdom teeth removed (and some other seriously major and expensive dental work) on Wednesday. I've been trying to come up with yummy and creative but cheap ways to make soft but not boring foods. Cha-ching - homemade vanilla pudding! This is Mark's mom's recipe (and probably originally HER mom's recipe) that went in banana pudding that we had several months ago at our last visit to Griffin. I hate bananas, but even I liked this stuff. So I figured that the pudding would be a winner.

Yesterday (when I made it) also happened to be one of the most stressful days I've had in a long time. I was TOTALLY stressed out when I started the pudding. I don't know if any of you have ever made pudding, but it takes time. But not only that - it takes attention. It DEMANDS attention. You have to stir. And stir. And stir. It isn't a difficult thing to make - you just have to stand there the whole time. And stir. And somewhere in all that stirring and standing, I remembered to breathe. I remembered that things have a way of working out. I remembered that I have family that loves me and friends who love me and Mark and I are not alone in this big, sometimes mean world. And I remembered that I have cooking. It is a good hobby to have - it can be cheap, it can take a lot of concentration and take your mind off of other things, and it (almost) always produces good results. And after stirring and stirring and calming down and thinking of all those things, and then sitting and waiting and cuddling with my puppy while the pudding got cold, we got to eat the result. And it was really, really good.

Creamy Vanilla Pudding

1/3 cup sugar
2 Tbsp. cornstarch
1/8 tsp. salt
2 c. milk
2 egg yolks, slightly beaten
2 Tbsp. butter, softened
2 tsp. vanilla (I always tend to "spill" the vanilla and add more than the recipe calls for....)

Slightly beat egg yolks in small to med. bowl, set aside.
Mix sugar, cornstarch, and salt in a 2-qt. saucepan. Gradually stir in milk. Cook over med. heat, stirring constantly, until thickens and boils. (This honestly takes forever.)


Boil and stir for 1 minute.
Stir in at least half of the hot mixture gradually into egg yolks. (Key words: STIR and GRADUALLY, or else you'll have scrambled eggs in your pudding.) Pour back into saucepan with rest of milk/sugar mixture, and blend well. Boil and stir for 1 minute.


Remove from heat and add butter and vanilla, stir well. (I mean, really. Butter. Vanilla. Milk. Eggs. What could be better than this??)
Pour into dessert bowls, cool slightly, and refrigerate.

(My recipe says it makes 4 servings ... I only got 3 out of it. I guess my serving sizes are too big...)

(Also, you can make butterscotch pudding by substituting 2/3 c. packed brown sugar for granulated sugar, and decreasing the vanilla to 1 tsp. I might not do that last part though...)

I didn't take many pictures of this, either. Sorry, friends. I'll try harder next time I cook...

Wednesday, October 13, 2010

Homemade Cinnamon Rolls!

The sweet potato ravioli is put on hold until Friday, because Kelly and Colton are at a Bob Dylan concert tonight, and couldn't come for dinner.

But, I did make cinnamon rolls today for the first time. They were a success! My poor, poor hubby is having a TON of major dental work done bright and early tomorrow at 7am, and they said he needed to eat beforehand. I'm well aware that a big sugary breakfast isn't quite what they meant, but I feel sorry for him (he probably won't be able to eat "real" food for a while), and he'll be more likely to eat something yummy like this early in the morning than something healthy. (And maybe I can get him to eat an egg as well...)

Anyway, I was going to use the recipe on the Pioneer Woman's website, until I looked it up and realized that it makes SEVEN pans of rolls. Seven! We don't need that many, and I don't have enough freezer space either ... oh well, maybe at the holidays I can make them as gifts.

So, it was off to Epicurious for some recipe-searching (oh, how I love that website! Thanks, Lissa and Mel!), and here's what I found:

(Apologies for not many pictures, but it's hard to cook with a puppy and make pictures at the same time!)

Cinnamon Rolls with Cream Cheese Glaze
For the dough:
1 cup whole milk
3 tablespoons unsalted butter
3 1/2 cups (or more) unbleached all purpose flour, divided
1/2 cup sugar 
1 large egg
2 1/4 teaspoons rapid-rise yeast (from 2 envelopes yeast) - NOTE: Fleishman yeast packets are 2 1/4 tsp. per packet, so you only need one if you're using that brand
1 teaspoon salt
Nonstick vegetable oil spray 
For the filling:
3/4 cup (packed) golden brown sugar
2 tablespoons ground cinnamon
1/4 cup (1/2 stick) unsalted butter, room temperature
For the glaze:
4 ounces cream cheese, room temperature
1 cup powdered sugar
1/4 cup (1/2 stick) unsalted butter, room temperature
1/2 teaspoon vanilla extract


For dough:
Combine milk and butter in glass measuring cup. Microwave on high until butter melts and mixture is just warmed to 120°F to 130°F, 30 to 45 seconds. (You'll want that butter to be at room temp - learn from my mistake, and don't use cold butter for that step.) Pour into bowl of stand mixer fitted with paddle attachment. Add 1 cup flour, sugar, egg, yeast, and salt. Beat on low speed 3 minutes, stopping occasionally to scrape down sides of bowl. Add 2 1/2 cups flour. Beat on low until flour is absorbed and dough is sticky, scraping down sides of bowl. If dough is very sticky, add more flour by tablespoonfuls until dough begins to form ball and pulls away from sides of bowl. (I probably added 3 more Tbsp?)


Turn dough out onto lightly floured work surface. Knead until smooth and elastic, adding more flour if sticky, about 8 minutes. Form into ball. 


Lightly oil large bowl with nonstick spray. Transfer dough to bowl, turning to coat. 


Cover bowl with plastic wrap, then kitchen towel. Let dough rise in warm draft-free area until doubled in volume, about 2 hours.  (And here's where my problem started: the dough wasn't rising! I don't know if it was my yeast, or what, but it didn't rise hardly AT ALL.)


For filling:
Mix brown sugar and cinnamon in medium bowl.
Punch down dough. Transfer to floured work surface. Roll out to 15x11-inch rectangle. Spread butter over dough, leaving 1/2-inch border. Sprinkle cinnamon sugar evenly over butter. (Sometimes I get overwhelmed with the cinnamon, so I used less than this recipe calls for.) Starting at 1 long side, roll dough into log, pinching gently to keep it rolled up. With seam side down, cut dough crosswise with thin sharp knife into 18 equal slices (each about 1/2 to 3/4 inch wide).
Spray two 9-inch square glass baking dishes with nonstick spray. Divide rolls between baking dishes, arranging cut side up (there will be almost no space between rolls). (Haha. Once again - my dough didn't rise.)


Cover baking dishes with plastic wrap, then kitchen towel. Let dough rise in warm draft-free area until almost doubled in volume, 40 to 45 minutes. (Okay, here was the next problem. See the above picture? That was before rising. These are after rising 45 minutes. I don't think they rose a milimeter.)


Position rack in center of oven and preheat to 375°F. Bake rolls until tops are golden, about 20 minutes. Remove from oven and invert immediately onto rack. Cool 10 minutes. Turn rolls right side up. (I forged on and baked them anyway, and you know what? They rose a bit during baking, and even though they're small, they still taste great!!)


For glaze:
Combine cream cheese, powdered sugar, butter, and vanilla in medium bowl. Using electric mixer, beat until smooth. Spread glaze on rolls. Serve warm or at room temperature.

These are delicious, despite the lack of rising. I'm going to make them again sometime (they're pretty easy, actually), with maybe some fresher yeast? They're good regardless though :)

Hope you all enjoy! And thanks to Epicurious for such amazingly yummy recipes :)

Tuesday, July 6, 2010

Ice cream and pasta...

Oh man, I can't wait until I get these next pictures developed (or at least a CD made...)

Because today, Kelly and I made homemade chocolate-almond-strawberry ice cream, and it is AMAZING. Like, tastes like Hagen-Daz. Yummy.

And right now, we're in the throes of pasta-making. It's messy business. We're taking a break and letting the pasta dough rest before we try to roll it out flat and even. Har har. We'll see. When we're done, it will hopefully be transformed into a delish dish of homemade mushroom ravioli with tomato cream sauce. But we'll see.

My timer just went off. Wish us luck!!

Wednesday, June 30, 2010

Strawberry Cake with Cream Cheese Icing

As I write this, I'm eating a second piece of this cake. It is good. Spoiling my dinner completely, but good.

I made this cake as a sort-of going away/I'm-being-really-really-nice-to-you-because-you're-leaving-soon gift for Mark. On Saturday, he's heading over to Georgia to his parents' house, where he'll spend a couple days, then depart on an overseas mission trip as... get this... a CHAPERON. Are we really old enough to be chaperons? Yeesh.

Anyway, he'll be gone a while, which makes me sad, so I'm doing things to make us both feel better. Like baking this cake...

Anyway, kudos to Whole Foods for the Strawberry Cake recipe! I was looking for one with actual strawberries, not strawberry Jello powder. And I found one! Here we go...

You're gonna need...

2 c. flour
1 c. sugar
1 Tbsp. baking powder
1 tsp. salt
4 eggs
1 1/2 sticks unsalted butter, melted
1 c. strawberry puree
1/2 c. milk

First, preheat your oven to 350 degrees. Then prep your pans, however you like to do 'em. Then, whisk all your dry ingredients (the flour, sugar, baking powder, and salt) in a big bowl. Like so:


Then beat all your wet ingredients together in your mixer (or a separate bowl, using a hand mixer.) Like so:

(I know, looks gross, right?)

Lucille, in action!


Then, after all that's been beaten into a frenzy, you're gonna add the wet ingredients to the dry ingredients, and whisk THEM together. Like so:


When it's ready, it's gonna look like this:


So then you pour all that into whatever you're baking it in. I used 2 round 9" cake pans. 


And then you patiently wait while it bakes for 30-35 minutes.

An excellent while-you-wait activity? Lick the bowl!!!


And then proceed to go insane from the heavenly smells coming from your oven. I swear, this batter smells like pure BUTTER while it's baking.

And then, DING, it's done!


Isn't this pretty?


Goodness, I love to bake.
Okay, so then you've got to let those cakes cool. While I was waiting, I made cheesy zucchini frittata for lunch. It'll be another post :)

Then, once those cakes are cool, time to make the icing!!

Keep in mind: this cake was made for my husband, who loves cheese. I swear, if I'd let him, he would LIVE on cheese. So I made the icing very, very cream chees-y. If you want your icing to taste more like sugar than cream cheese, don't use this one. (Or, do, and just cut the cream cheese in half.)

Here's what I did:

Cream 1 stick (1/2 cup) butter and 2 8-oz. packets of cream cheese really really well.


Then add some vanilla. I used whatever was left in my bottle ... probably somewhere between 1 and 2 tsp. 


Cream that together.

(I love my mixer and her action shots!)


Then add confectioner's sugar - the original recipe I was using called for 2 cups, but I upped it to three so it'd be a bit sweeter.


Then mix all of THAT together, and ice and decorate your cake!!


Another helpful hint: this icing is really creamy. REALLY. It would be next-to-impossible to pipe with. So if you're loving a piped look, you probably want to go with Royal icing to do your pipe work. I personally thought the strawberries were just as good, even though I LOVE a piped cake :)

And then ... eat it!!


(Why yes, we are pigs! However could you tell?)

Happy baking, everyone!

Tuesday, June 22, 2010

Chocolate Peanut Butter Pie

I made my hubby a pie this morning. He is at his internship, slaving away for free (well ... maybe not slaving...) and I thought it would be nice for him to come home to a treat!

This recipe is from my mom. I don't know where she got it, but it's good. Yum yum yum :)

For this pie, you're going to need a chocolate graham cracker pie shell:


(I'm not sure why some of these pictures like to turn themselves sideways...)

You're also going to need 1/2 cup of melted semi-sweet chocolate chips, 1/3 cup of peanut butter, 2/3 cup Eagle Brand (sweetened condensed milk) - it ends up being about 1/2 a can, and 1 1/3 cup heavy whipping cream. (And 2 bowls - since I have a stand mixer, I just did the chocolate part first, and then put it in a different bowl, and then did the peanut butter next.)

So, this first part, there were too many things to do and it was too messy to take pictures. Oh well. You're going to want to melt your chocolate chips first (I did mine in the microwave), and put them in a bowl. 
Measure out 1/3 c. of your Eagle Brand and mix it in with the chocolate really well with a spoon. 
Then pour 2/3 c. of the whipping cream in a bowl, and beat it into a frenzy with either a stand mixer or a hand mixer. You want the consistency to be about that of mayonnaise. 
At this point, I put the chocolate mixture in a separate bowl, and washed my mixer bowl and paddle. I stuck the chocolate in the fridge, and it might have set up just a bit too much ... so maybe don't put it in the fridge?

Then you're going to do the same thing with the peanut butter. 1/3 c. peanut butter, mix it with 1/3 c. Eagle Brand.
Pour another 2/3 c. whipping cream in the bowl, and beat that one into a frenzy too. For some reason, my peanut butter didn't set up like my chocolate did. I even put it in the fridge after it was done mixing ... I don't know if it was the kind of PB I used or what. (I use Maranatha Organic No-Stir PB, btw.)
So anyway.
As an aside...

Lucille, meet BlogLand. BlogLand, meet Lucille. She's pretty much my BFF (at least in the kitchen.)

This is Lucille in action, with the peanut butter.
A blur of whipping!!

Anywho.
After you've got your two mixtures whipped really well, you're going to put them in your crust.


You should alternate the PB and chocolate, so they'll swirl nicely later. This is what my first little circle looked like ... so neat and pretty :)


Then it got messy.


And then even messier.

So after you've got all these nasty-looking blobs filling your pie shell, you're supposed to run a knife through it, and make it pretty. I sort of mixed it up with a knife, then tried to make it swirly. I'm not sure what I think about the final outcome ... definitely better than the blobs, but not exactly the prettiest pie I've ever made...


But. It tastes AMAZING. I know because I scraped all that goodness off the knife, and it went straight into my mouth. Yum yum.

(During this whole process, I may or may not have consumed obscene amounts of Eagle Brand, both straight from the can and mixed with chocolate. That stuff is like crack. And will assuredly give you a stomach ache if you eat too much.)

Hopefully Mark will enjoy this pie when he gets home. I don't see why he wouldn't ... he loves chocolate and peanut butter mixed up together. Add Eagle Brand and whipping cream, and that's a recipe for yummy right there!

Happy (no)Baking!