Wednesday, June 30, 2010

Strawberry Cake with Cream Cheese Icing

As I write this, I'm eating a second piece of this cake. It is good. Spoiling my dinner completely, but good.

I made this cake as a sort-of going away/I'm-being-really-really-nice-to-you-because-you're-leaving-soon gift for Mark. On Saturday, he's heading over to Georgia to his parents' house, where he'll spend a couple days, then depart on an overseas mission trip as... get this... a CHAPERON. Are we really old enough to be chaperons? Yeesh.

Anyway, he'll be gone a while, which makes me sad, so I'm doing things to make us both feel better. Like baking this cake...

Anyway, kudos to Whole Foods for the Strawberry Cake recipe! I was looking for one with actual strawberries, not strawberry Jello powder. And I found one! Here we go...

You're gonna need...

2 c. flour
1 c. sugar
1 Tbsp. baking powder
1 tsp. salt
4 eggs
1 1/2 sticks unsalted butter, melted
1 c. strawberry puree
1/2 c. milk

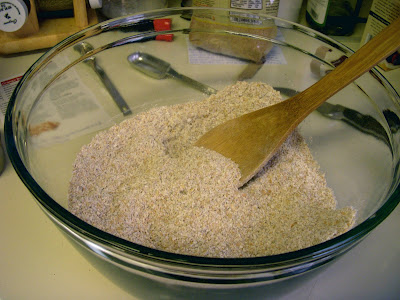
First, preheat your oven to 350 degrees. Then prep your pans, however you like to do 'em. Then, whisk all your dry ingredients (the flour, sugar, baking powder, and salt) in a big bowl. Like so:


Then beat all your wet ingredients together in your mixer (or a separate bowl, using a hand mixer.) Like so:

(I know, looks gross, right?)

Lucille, in action!


Then, after all that's been beaten into a frenzy, you're gonna add the wet ingredients to the dry ingredients, and whisk THEM together. Like so:


When it's ready, it's gonna look like this:


So then you pour all that into whatever you're baking it in. I used 2 round 9" cake pans. 


And then you patiently wait while it bakes for 30-35 minutes.

An excellent while-you-wait activity? Lick the bowl!!!


And then proceed to go insane from the heavenly smells coming from your oven. I swear, this batter smells like pure BUTTER while it's baking.

And then, DING, it's done!


Isn't this pretty?


Goodness, I love to bake.
Okay, so then you've got to let those cakes cool. While I was waiting, I made cheesy zucchini frittata for lunch. It'll be another post :)

Then, once those cakes are cool, time to make the icing!!

Keep in mind: this cake was made for my husband, who loves cheese. I swear, if I'd let him, he would LIVE on cheese. So I made the icing very, very cream chees-y. If you want your icing to taste more like sugar than cream cheese, don't use this one. (Or, do, and just cut the cream cheese in half.)

Here's what I did:

Cream 1 stick (1/2 cup) butter and 2 8-oz. packets of cream cheese really really well.


Then add some vanilla. I used whatever was left in my bottle ... probably somewhere between 1 and 2 tsp. 


Cream that together.

(I love my mixer and her action shots!)


Then add confectioner's sugar - the original recipe I was using called for 2 cups, but I upped it to three so it'd be a bit sweeter.


Then mix all of THAT together, and ice and decorate your cake!!


Another helpful hint: this icing is really creamy. REALLY. It would be next-to-impossible to pipe with. So if you're loving a piped look, you probably want to go with Royal icing to do your pipe work. I personally thought the strawberries were just as good, even though I LOVE a piped cake :)

And then ... eat it!!


(Why yes, we are pigs! However could you tell?)

Happy baking, everyone!

Tuesday, June 29, 2010

Ina Garten's Blueberry Coffee Cake Muffins

I got up at 5am to make these bad boys for my co-workers (and my hubby) the other day. In my sleepy stupor, I was lucky to include all the ingredients, let alone pictures. I'll let the "official" Barefoot Contessa Photos be enough...

(source found here)

I don't claim that they're healthy or anything, but man, they sure are good. I probably ate 5 in one day.

Here's the recipe. It says it makes 16 muffins, but I managed to get 24 somehow. Anyway ... you NEED to go and make these. Right now.

Ina Garten's Blueberry Coffee Cake Muffins
 You'll need:
12 tablespoons (1 1/2 sticks) unsalted butter, at room temperature
1 1/2 cups sugar
3 extra-large eggs, at room temperature
1 1/2 teaspoons pure vanilla extract
8 ounces (about 1 cup) sour cream
1/4 cup milk
2 1/2 cups all-purpose flour
2 teaspoons baking powder
1/2 teaspoon baking soda
1/2 teaspoon kosher salt
2 half-pints fresh blueberries, picked through for stems

To make:
Preheat the oven to 350 degrees F. Place 16 paper liners in muffin pans.
In the bowl of an electric mixer fitted with the paddle attachment, cream the butter and sugar until light and fluffy, about 5 minutes. With the mixer on low speed, add the eggs 1 at a time, then add the vanilla, sour cream, and milk. In a separate bowl, sift together the flour, baking powder, baking soda, and salt. With the mixer on low speed add the flour mixture to the batter and beat until just mixed. Fold in the blueberries with a spatula and be sure the batter is completely mixed.
Scoop the batter into the prepared muffin pans, filling each cup just over the top, and bake for 25 to 30 minutes, until the muffins are lightly browned on top and a cake tester comes out clean.

They are so, so delightful. Imagine these with fresh-squeezed orange juice and some scrambled eggs ... yum yum yum!!

Monday, June 28, 2010

Eggplant Sandwiches

I am SO far behind with this blog. We have had so much delicious food lately (think pan-fried fish with squash salsa and salad greens, angel hair pasta with tomato and basil...) that I haven't had time or energy to blog about. (And some of it, no pictures.)

Before I talk about all that though, I have a book recommendation. 


(source here)

Warning: this book may very well change your life. It might also make you cry, laugh, and possibly both at the same time. It might make your heart swell so much you think it'll burst. It might make you want to go to Italy so bad you can taste it. You may, after reading this book, find yourself tearing up over oranges at the grocery store, understanding fully what you're doing by buying oranges from California when you live in Alabama, but not knowing what else to do at this point. You may, after reading this book, go completely insane and want to buy a farm.

All of the above? Yep. That's me.

Luckily, I can assuage some of my orange-guilt soon, because we're going to start subscribing to a local CSA (community-supported agriculture) called GrowAlabama. It makes my heart happy. We will get a box of fruits and veggies every week, all grown locally and organically, for about the same price as I pay for a weeks' worth of (not-organic, not-local) veggies at my nearby grocery store. Plus, farm eggs!!! So exciting.

Anyway, onto the food. How appropriate, after talking about CSA, that my recipe comes from the Real Simple article about Farmer's Market recipes. I know some of you have made this, and some of you have actually blogged about it, but I wanted to make it as well. And blog about it. Mainly because it's just so darn pretty. 

(Yes, I am one of THOSE people. The people who think vegetables are some of the most beautiful things on God's green earth. The people who love to shop for these healthy treats, because they're not only yummy, but aesthetically pleasing as well.)

Without further ado:

Eggplant Sandwiches:

First, you want to find a really pretty eggplant. (Or an ugly one, even.) Slice it into 8 slices.
Like so.

Then measure into 3 bowls 1/2 c. flour, 2 beaten large eggs, and a cup of Panko bread crumbs. You're gonna dip those eggplant slices into the flour first, and coat them really well, then go to the egg, and let it drip a bit, and then the breadcrumbs, mashing them gently so they'll stick.


(my bowls, post-dipping)

And then, into a frying pan they go! You'll use 1/4 c. canola oil for the first four...


...then when they get all nice and brown...


...put them on a paper towel, and wipe out the pan, and do the same thing with another 1/4 c. canola oil and the other four eggplant slices.


Salt the eggplant while it's still hot, and then you can make them into sandwiches. The recipe suggests using 2 eggplant slices as your "bun," and layering tomato slices, roamine lettuce, goat cheese, and basil in between. We didn't have any romaine, so I used spinach. And I figure any sort of cheese would be pretty awesome, even though we did use the goat cheese it called for. They were so yummy, and a great vegetarian dish!

(I really do eat meat. I know it doesn't look like it, but I do. I just have happened to have some really, really awesome meatless recipes lately!)


And there you have it. The sandwich in all its glory.


Now, is that pretty, or what??


(P.S. Check back tomorrow morning for a pictureless-but-AMAZING recipe from Mrs. Ina Garten!)

Thursday, June 24, 2010

Orange Bran Flax Muffins!

These are about the healthiest muffins on the planet. They are so full of bran-y flax-y fiber-y goodness you won't know what to do with yourself! And they taste pretty good, too :)

You're going to need:
1 1/2 c. oat bran
1 c. all-purpose flour
1 c. ground flaxseed
1 c. wheat bran
1 Tbsp. baking powder
1/2 tsp. salt
2 oranges, quartered and seeded
1 c. brown sugar
1 c. buttermilk
1/2 c. canola oil
2 eggs
1 tsp. baking soda
1 1/2 c. golden raisins (I left those out of my muffins, cause I'm not a fan of raisins. I wish I had some nuts to add, though.)

First, preheat the oven to 375. Line or spray your muffin tins (you're going to need 2 12-cup tins - this recipe makes 24 muffins!)
In a large bowl, combine:

oat bran,

flour,

flaxseed,

wheat bran,

baking powder, and salt. Mix well and set aside.

Then, in a blender or food processor (oh my GOSH I want a food processor), combine:
oranges,

(and I hit the pulse button a couple of times so there would be more room)

brown sugar (I ran out, so I used 1/2 c. brown sugar and 1/2 c. white sugar)

buttermilk, oil, eggs, and baking soda. 

Blend well.

Pour orange mixture into dry ingredients. Mix until well blended. Stir in raisins (if you're using them. Or nuts. Or whatever else you decide would taste good.)

Then you just divide the batter into the muffin tins. 

(And I put some rolled oats on top of mine, cause I think it's pretty.)

Then you'll bake them at 375 degrees for 18-20 minutes. And voila!

Such healthy little muffins ... and they'll last us FOREVER! (It will take nearly two weeks for us to eat up 24 muffins!)

And, for those who are interested, here's the nutritional info:
Per muffin:
186 calories, 4g. protein, 30 g. carbs, 8 g. fat (about 1/2 of that is alpha-linolenic acid, the super-healthy kind of fat), 1 g. saturated fat, 18 mg. cholesterol, 3 g. fiber, 140 mg. sodium, and 4 g. flaxseed.

I would sing the praises of flaxseed all the livelong day if I could. I love that stuff. My body really loves that stuff. It is very, very good for you. If you aren't eating it, you should be! (And these muffins are a great way to start.)

Tuesday, June 22, 2010

Chocolate Peanut Butter Pie

I made my hubby a pie this morning. He is at his internship, slaving away for free (well ... maybe not slaving...) and I thought it would be nice for him to come home to a treat!

This recipe is from my mom. I don't know where she got it, but it's good. Yum yum yum :)

For this pie, you're going to need a chocolate graham cracker pie shell:


(I'm not sure why some of these pictures like to turn themselves sideways...)

You're also going to need 1/2 cup of melted semi-sweet chocolate chips, 1/3 cup of peanut butter, 2/3 cup Eagle Brand (sweetened condensed milk) - it ends up being about 1/2 a can, and 1 1/3 cup heavy whipping cream. (And 2 bowls - since I have a stand mixer, I just did the chocolate part first, and then put it in a different bowl, and then did the peanut butter next.)

So, this first part, there were too many things to do and it was too messy to take pictures. Oh well. You're going to want to melt your chocolate chips first (I did mine in the microwave), and put them in a bowl. 
Measure out 1/3 c. of your Eagle Brand and mix it in with the chocolate really well with a spoon. 
Then pour 2/3 c. of the whipping cream in a bowl, and beat it into a frenzy with either a stand mixer or a hand mixer. You want the consistency to be about that of mayonnaise. 
At this point, I put the chocolate mixture in a separate bowl, and washed my mixer bowl and paddle. I stuck the chocolate in the fridge, and it might have set up just a bit too much ... so maybe don't put it in the fridge?

Then you're going to do the same thing with the peanut butter. 1/3 c. peanut butter, mix it with 1/3 c. Eagle Brand.
Pour another 2/3 c. whipping cream in the bowl, and beat that one into a frenzy too. For some reason, my peanut butter didn't set up like my chocolate did. I even put it in the fridge after it was done mixing ... I don't know if it was the kind of PB I used or what. (I use Maranatha Organic No-Stir PB, btw.)
So anyway.
As an aside...

Lucille, meet BlogLand. BlogLand, meet Lucille. She's pretty much my BFF (at least in the kitchen.)

This is Lucille in action, with the peanut butter.
A blur of whipping!!

Anywho.
After you've got your two mixtures whipped really well, you're going to put them in your crust.


You should alternate the PB and chocolate, so they'll swirl nicely later. This is what my first little circle looked like ... so neat and pretty :)


Then it got messy.


And then even messier.

So after you've got all these nasty-looking blobs filling your pie shell, you're supposed to run a knife through it, and make it pretty. I sort of mixed it up with a knife, then tried to make it swirly. I'm not sure what I think about the final outcome ... definitely better than the blobs, but not exactly the prettiest pie I've ever made...


But. It tastes AMAZING. I know because I scraped all that goodness off the knife, and it went straight into my mouth. Yum yum.

(During this whole process, I may or may not have consumed obscene amounts of Eagle Brand, both straight from the can and mixed with chocolate. That stuff is like crack. And will assuredly give you a stomach ache if you eat too much.)

Hopefully Mark will enjoy this pie when he gets home. I don't see why he wouldn't ... he loves chocolate and peanut butter mixed up together. Add Eagle Brand and whipping cream, and that's a recipe for yummy right there!

Happy (no)Baking!