Wednesday, October 6, 2010

Sweet Potato and Sausage Soup

I am a really, really awful blogger. I apologize for the long hiatus ... it's not like we've not been eating absolutely delicious food ... I just got tired of taking pictures while cooking. But, this looked so scrumptious and exciting and FALL-ish that I couldn't resist.

We've been getting gobs of sweet potatoes in our CSA (which, by the way, I ADORE), and I've been coming up with some pretty creative uses for them, thanks in part to Epicurious, and in part to Smitten Kitchen. Oh Deb, you are genius. This particular recipe, by chance, comes from both - originally posted on Epicurious, Deb posted it on HER blog a couple years ago. And I'm posting it again.

It's the perfect recipe for fall/winter, when the weather's getting colder and the leaves are changing and falling, and the perfect recipe for when you've just had dental work done, and your mouth hurts. There's not too much chewing involved, save the sausage.

So here we go.

What you'll need:
-3 tablespoons extra-virgin olive oil, divided
-1 10- to 11-ounce fully cooked smoked Portuguese linguiƧa sausage or chorizo sausage, cut crosswise into 1/4-inch-thick slices (I used chorizo)
-2 medium onions, chopped
-2 large garlic cloves, minced
-2 pounds red-skinned sweet potatoes (yams; about 2 large), peeled, quartered lengthwise, cut crosswise into 1/4-inch-thick slices
-1 pound white-skinned potatoes, peeled, halved lengthwise, cut crosswise into 1/4-inch-thick slices
-6 cups low-salt chicken broth (I actually used just 4 cups, because I wanted more of a thick hearty stew than a soup...)
-1 9-ounce bag fresh spinach (And I didn't use this much spinach)

To Make:
Chop up all your veggies and sausage.


Then get a really big pot, and heat 2 Tbsp. olive oil over med-hi heat. 
Add the sausage, and brown, cooking for around 8-ish minutes. After it's nice and brown, transfer it to a paper towel-lined plate to drain. 
Then add the onions and garlic to the pot, and cook them till translucent, about 5 minutes. I personally had to add a bit of extra oil, since some of mine poured out onto the paper towels with the sausage.
Once the onions are translucent, then you add all the potatoes. It looks like a TON of potatoes, but it will cook down a bit. You cook them for about 12 minutes, until they're getting soft. It requires a lot of stirring and scraping.


Beautiful :)
Once those babies are nice and soft, add however much chicken broth you want - add more if you want a soup, add less if you want a thicker stew-like something.


Scrape the browned bits off the bottom of your pot, and then bring to a boil.
Once it's boiling, turn the heat down to med-low, cover your pot, and simmer simmer simmer for about 20 minutes, stirring occasionally. 


After it's done simmering away, mash some of the potatoes in the pot with a potato masher. 
Then add your sausage.


The original recipe doesn't say this, but I sort of let mine sit for a few minutes and get warm, and let the soup soak up some of that sausage-y taste.
Then add your spinach, stir it in, and let it simmer for another 5 minutes, or until the spinach just wilts.

And voila, you're done! You can add salt and pepper to taste, but I honestly didn't think this soup needed anything extra at all.

I had every intention of making cornbread to go with this, but I completely forgot about it until after the soup was done. I figure I'll whip up a batch tonight, because we'll be eating leftovers for several days anyway, plus some different soup later this week. It's a soup kind of week in the Skinner household.

Hope everyone enjoys - this is DELICIOUS!

Wednesday, August 11, 2010

Summer Squash Croquettes

This is the perfect summer side dish (or you can do like we did, and use these as the main course.) SO YUMMY! I never used to like squash much - mainly because the only way I ever ate it (unwillingly) was boiled to a mushy nothingness by my grandma. (Whose only method of cooking vegetables, apparently, was boiling. She missed out on SO MUCH GOODNESS.)

Anyway.

I found this recipe at work in a Cooking Light magazine laying around. I believe it's the June 2010 one. These things are so yum.

First, you get some squash.

And cut it up in chunks.

So that it measures 4 2/3 cups
(I know that's a liquid measuring cup. But it's about right. And I'm okay with unexactness in cooking ... just not baking.)

Then you cut up some scallions.

And then you steam those babies right up.
And if you're like me, and you don't have a steamer basket, you get creative.

The ghetto steamer.

Isn't that pretty?

So after they're nice and steamy and soft, you mash 'em up with a fork.
This is easier said than done. So I used a fork ... and then I used a big knife to help the process along.

After you've got a big pile of mush, you dump it in a bowl.

And then you crush up some saltines, and put them into another liquid measuring cup. Incorrectly. Martha Stewart is probably rolling her eyes at me.

Then you put those in the bowl with the squash mush, plus some eggs and a little sugar and salt, and stir it all together.

And then it goes in the fridge for a while.

Once that's done, you're ready to cook your croquettes!
Put some of the mixture in a mesh strainer and squeeze the liquid out.

Then (and this is also easier said than done), make a little squash patty, dredge it in cornmeal, and put it in a big pan with hot oil.

And cook those croquettes right up! We ate ours as our main dish with a side of salad. So healthy, so yummy! Mark loved them. 

Hubby stamp of approval: check!

Now, here's the real recipe (with my slight modifications):

Summer Squash Croquettes
Ingredients:
  • 4 2/3  cups  coarsely chopped yellow squash (about 1 1/4 pounds)
  • 1/2  cup  chopped green onions
  • 1  cup  crushed saltine crackers (about 30 crackers)
  • 1/2  teaspoon  salt
  • 1/2  teaspoon  sugar
  • 2  large eggs
  • 1/4  cup  yellow cornmeal (I ended up using more than this)
  • Cooking spray (I HATE cooking with PAM, so I just used oil)
  • 1  tablespoon  canola oil, divided (because I didn't use cooking spray, I increased this by a little bit.)
  • Sliced green onions (optional)

Directions:
1. Steam squash and 1/2 cup onions, covered, 15 minutes or until tender. Drain well. Mash mixture with a fork. (And also a knife.) Stir in crackers and next 3 ingredients (through eggs). Cover and chill for 3 hours; drain well in a fine mesh strainer.
2. Place cornmeal in a shallow dish. Divide squash mixture into 12 equal portions, shaping each portion into a 1/2-inch-thick patty. (Seriously, easier said than done...) Lightly coat each patty with cooking spray. Dredge in cornmeal.
3. Heat 1 teaspoon canola oil in a large nonstick skillet coated with cooking spray over medium-high heat. Place 4 patties in pan; cook 1 1/2 minutes on each side or until golden. Remove patties from pan. Repeat procedure 2 times with remaining 2 teaspoons oil and 8 patties. Garnish with onions, if desired. Serve immediately.

Hope you all enjoy!

Friday, August 6, 2010

Eggplant Parmesan

I am a terrible food blogger. I can't believe my last post was 9 days ago!! 

Oh well. Nothing I can do about it now...
Last night I made eggplant parmesan. Or, Eggplant Parmigiana, if you want to be correct and technical. It came from one of my mom's recipe files, and I have no idea who to credit the recipe to. But oh, it is yummy. Mark RAVED about it last night. He said it belonged at Leonardo's, "our" Italian restaurant. (Where we went on our first date, where we went the night we got engaged, etc. etc.) He literally begged for seconds.

So, you want it now? Here it is.

You start with eggplants. I soaked mine in heavily salted water for maybe 30 minutes? I've heard that helps get the bitter taste out, and also helps them retain their shape.

After they soak, you broil them in the oven
Till they're pretty and browned, like so
Then you take a 9x13 baking dish, and smear 1/2 cup of marinara sauce all over the bottom

Then you layer half the eggplant on top of that

Then more marinara

Then some cheese

And repeat!
Then you pop it in the oven
You're supposed to cover it with foil. I forgot, but that was okay, because Mark says he likes his cheese crispy anyway :)
 Et voila!

It's super easy, super yummy, and pretty darn healthy. There's a fair amount of cheese in it, but it's gotta have at least 2 servings of veggies per serving, maybe even 3. And what's better than that??

Here's the real recipe:
Make-Ahead Eggplant Parmingiana

You need:
2 eggplants, about 2 1/2 lb., cut into 1/2-in-thick rounds
nonstick cooking spray
1/2 tsp. pepper
1 jar (26 oz) marinara sauce, or you can make your own
(I was lazy, and used the jarred kind.)
1 1/2 c. shredded mozzarella (I kind of rounded up and used more like 2 c.)
1/2 c. grated Parmesan

To make:
Salt or soak your eggplant if desired. Heat your broiler, and place half the eggplant on a broiler rack. (Or my ghetto version - a cooling rack placed on top of a baking sheet. Hey, it works.) Evenly coat the eggplant with cooking spray, and sprinkle it with 1/4 tsp. pepper. (I estimated.) Broil 4 in. from broiler, 4-8 minutes per side, till lightly browned. Repeat with the rest of your eggplant.
Heat oven to 350 degrees.
Spread 1/2 c. marinara in a shallow 3-qt. baking dish. Line with half the eggplant. Spoon on 1 1/4 c. marinara, top with 1 c. mozzarella. Then repeat with remaining eggplant, sauce, and mozzarella. Sprinkle with Parmesan, and cover with foil. (I forgot that one... oops.) 
**NOTE: you can indeed make this recipe early, and stop at this step, keeping the covered dish in the fridge for a day. Just add 10 minutes to your baking time if it's coming straight from the fridge.**
Bake for 45 minutes, or until bubbly. Let rest for 15 minutes. (We're never good at the "let rest" part of recipes....)
Enjoy!! It's a good one :)

Wednesday, July 28, 2010

I'm back!

I can't believe that I have neglected this blog for so long. Things have been a little busy here, traveling every which way... but I am back, with photos of our pasta adventure! (I accidentally threw away the recipe ... oops...)

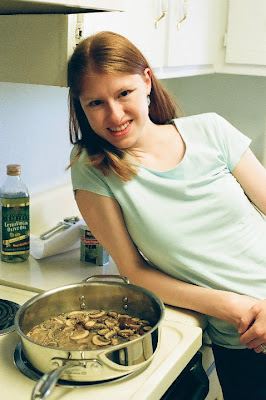
We started with the mushroom filling. Isn't that just gorgeous?

Maybe not the most flattering picture of me ever...

After the mushrooms were cooked, we blended them with a ricotta cheese mixture in the blender, and I mutilated a plastic spoon. (We later picked bits of the spoon out of our ravioli. Thank heavens we didn't have dinner guests!)

After that mixture was done, it was set aside, and we started the pasta process. And oh my, what a process it was.

First you make this little mountain of flour, and make a valley and put some eggs in it.

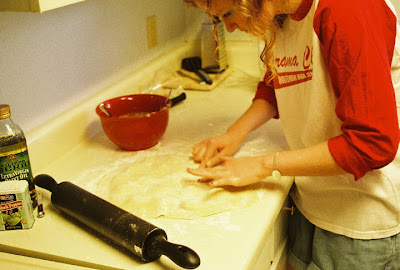
Then you knead it for a while. Kelly had this job. She wasn't too sure about it, I don't think...

Eventually after enough kneading, it'll turn into a ball.

Then you split the ball in two, and roll them out into sheets. You try to make the sheets as even as possible, but that's easier said than done.

Then after those sheets are rolled, you spoon the mushroom/ricotta mixture onto the pasta. (Side note: every single time I try to spell "mushroom," I try to spell it like this: muschroom. I don't know why, and it's annoying!!)

After your mushroom mixture is on the pasta, you cover it with the other sheet and squish them together. Then you cut them into (sort-of) squares, and let them dry for like an hour.

After they'd dried for like half the time, we made a tomato cream sauce for the ravioli. That was some good stuff, although it needed some more salt. It was better the second day, when the flavors had blended a little bit better.

And after the pasta was all nice and dry-ish, into a big pot it went, and voila!


Mushroom ravioli on my patio outside. It was a lovely way to end an evening.


But to be perfectly honest, while it was quite a fun adventure, and very delish ... I'm not sure that I'll do homemade pasta again anytime soon. The whole thing took 3 hours to make, and lots of elbow grease between the rolling and the kneading. It was extremely work-intensive, and I DEFINITELY wouldn't want to do it all by my lonesome.

Coming up next (hopefully soon) ... lemon dill fish, summer squash croquettes, and quiche!

Tuesday, July 6, 2010

Ice cream and pasta...

Oh man, I can't wait until I get these next pictures developed (or at least a CD made...)

Because today, Kelly and I made homemade chocolate-almond-strawberry ice cream, and it is AMAZING. Like, tastes like Hagen-Daz. Yummy.

And right now, we're in the throes of pasta-making. It's messy business. We're taking a break and letting the pasta dough rest before we try to roll it out flat and even. Har har. We'll see. When we're done, it will hopefully be transformed into a delish dish of homemade mushroom ravioli with tomato cream sauce. But we'll see.

My timer just went off. Wish us luck!!

Sunday, July 4, 2010

I'm Still Here!!

I promise I'm not neglecting this blog on purpose.

But Mark took our digital camera to Belize.

And all I have is film.

So you're going to have to be patient.

It will be worth waiting for, because my lovely sister and I are going to make some freaking fantastic food this week. (Read: homemade ravioli. Like, the pasta. Will be homemade. Man oh man, what a great photo-op that will be...)

I know you're all on the edge of your seats, waiting with bated breath.

The food will return very soon, I promise.

Thursday, July 1, 2010

Cheesy Zucchini Frittata

Yesterday, in my Strawberry Cake post, I mentioned the frittata I made while I was waiting for the cake to bake. I decided to do a separate post about it, because it's delicious and tastes basically like a garden :) I like it when my food tastes like what it's made out of.

It's a pretty basic recipe. 
You'll need:

4 eggs
4 c. shredded zucchini
2 c. peeled shredded carrots
1/2 c. flour
3/4 c. mayo
1 c. shredded Monterey Jack cheese
1/2 c. grated Parmesan
1/4 c. chopped onion
1 tsp. basil (I highly recommend using fresh leaves)
pepper to taste
First, you've got to shred all those veggies. It takes an awful lot more arm power than I was expecting to shred 6 cups of squash and carrots...

Here's the site of the veggie massacre.
Started with zucchini:

Moved on to carrots:

Isn't that pretty? I'm such a nerd, but I just think vegetables are beautiful.

Okay, so now that your arms are about to fall off...
You're gonna beat your four eggs in a mixing bowl.
And then you're gonna fold in all the other ingredients.


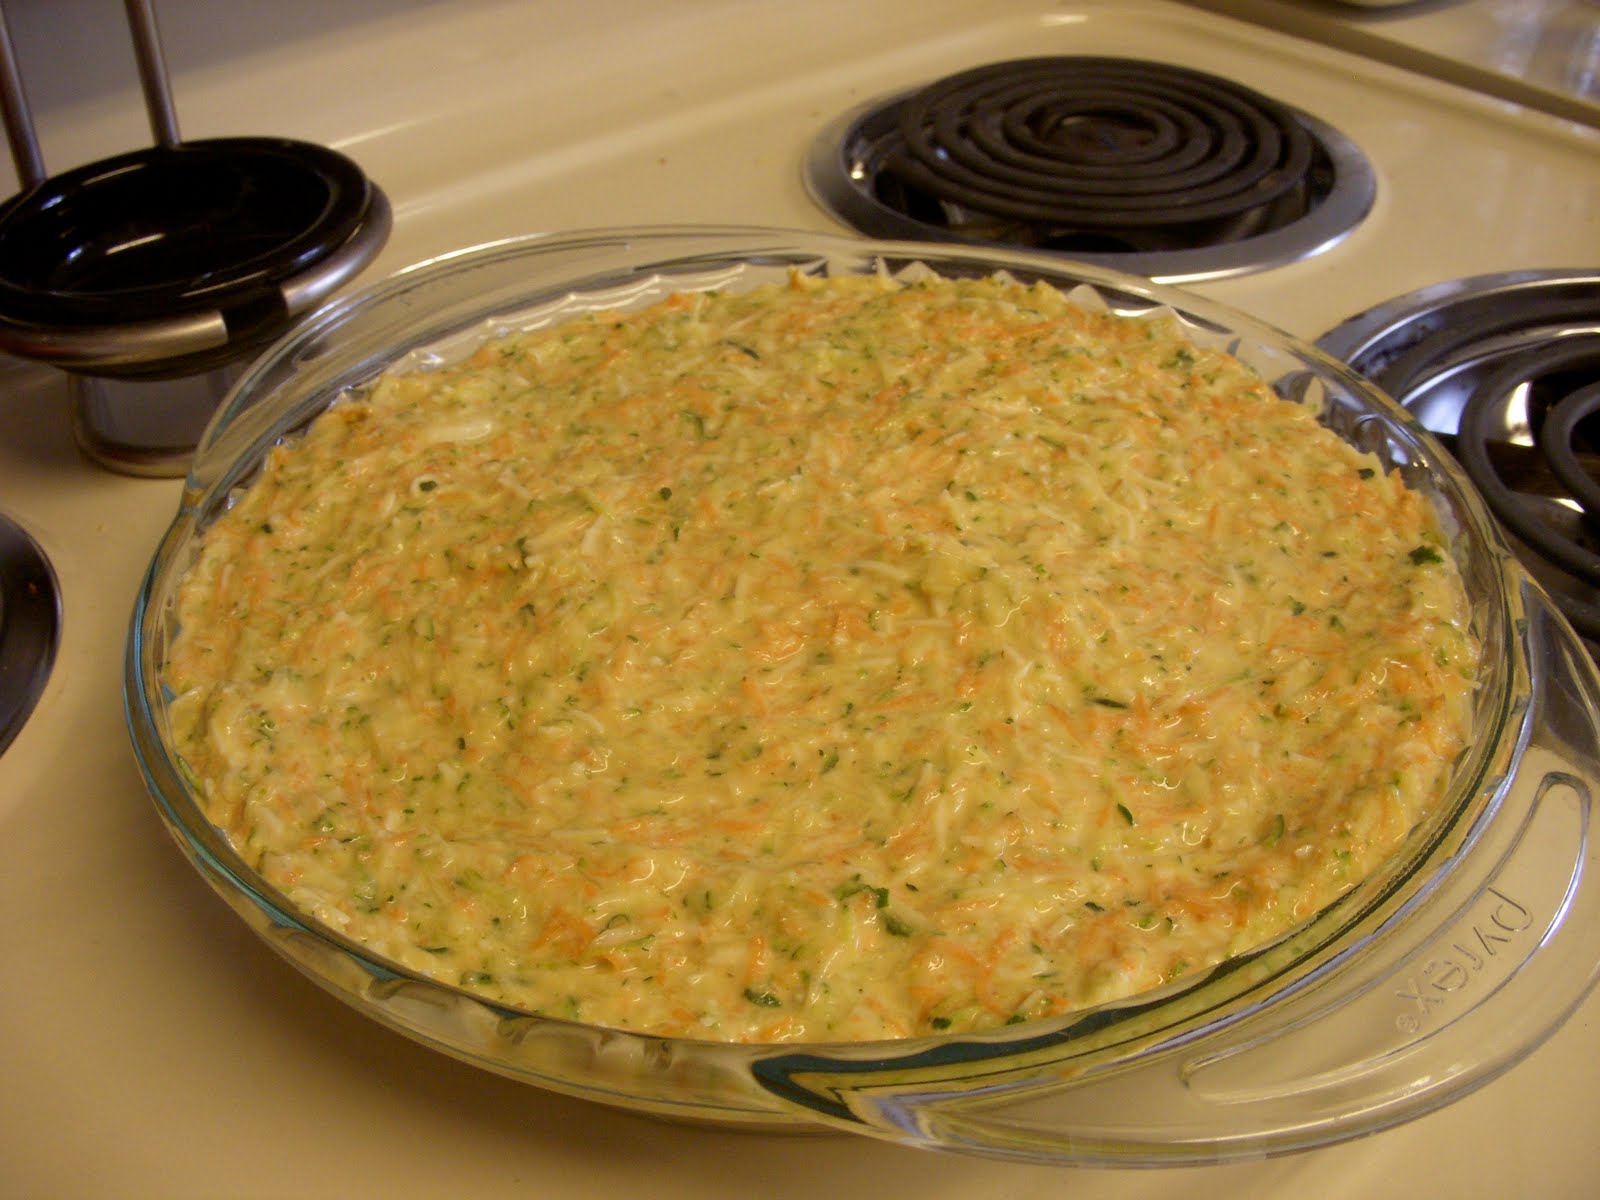
Now, this is where it got tricky for me. My recipe says "Pour into buttered quiche pan." I don't technically have a quiche pan. So I'm thinking, okay, well I'll just do a pie plate. 
And then I was thinking "...Will it fit? I don't know .. Maybe I should do TWO pie plates."
And then I thought .... "Nah. My recipe says one. It'll be fine."

Should've gone with the first instinct. Or planned to bake it a lot longer than the directions call for.
Yum, yum. So, the recipe says to bake it at 375 for 30 minutes. I do so, and get it out, and the middle is definitely still RUNNY. I did put the pie plate on top of a cookie sheet just in case it ran over the edge, so that may have been the problem. I don't know. I just know that I ended up cooking it for another 15-20 minutes, and it was still not quite completely set in the very middle.


Obviously, we ate it anyway. I let it sit for a while after we cut the first pieces, and it was much better today. Also, the flavors had a night to combine, and it was just delish. The only thing I might change in the future is to decrease the amount of mayo, because you can sort of taste it, and I'm not the biggest fan of mayonnaise in general. Maybe I could do like half mayo and half sour cream or something, to keep the consistency right.

But anyway, it seriously tastes like a garden. It's mostly zucchini, with some eggy stuff holding it all together, and you can taste the squash and carrots and onions and basil, and it's just wonderful.

Yummy lunch for three days? Check!
Happy eating!