Showing posts with label baking. Show all posts

Saturday, October 30, 2010

An adventure in firsts:

A few weeks ago, I got some apples in my CSA box. My initial reaction was to buy caramel sauce, and make a lovely snack to take to work with me. Sadly, I couldn't find any caramel sauce in stores whose first ingredient WASN'T high fructose corn syrup, which I try to avoid.

So I said to myself, hmmm. I've been cooking a lot lately... trying new things... I'm sure it's not that hard ... I'll just make some myself! So, I bought some brown sugar and went home to find a recipe.

I quickly found out that contrary to what I originally thought ... caramel sauce is not made of brown sugar.

So I scratched that, went to Epicurious (which is my favorite), got out my sugar jar and assembled the rest of the ingredients.


It's pretty simple. Water, sugar, cream, and butter.

And here's what you do:

Stir 1 1/2 c. sugar and 1/2 cup water in heavy, large saucepan over medium-low heat until sugar dissolves.


Then you increase the heat (I went somewhere between med-hi and high), and boil without until the syrup turns a golden amber color (around 12 or so minutes, maybe a little less.) (This is modified from the original recipe, which called for deep amber. The comments suggested that you stick with golden. It was a good idea.) You can occasionally brush down the sides of the pan with a pastry brush, if needed, and swirl the pan to mix.

Just boiling...

Starting to turn...

And this is the color I stopped at.

Remove from heat, whisk in butter. (I stirred rather than whisked, and that may have been a bad idea.)


Gradually add cream (mixture will bubble vigorously), and stir over low heat until smooth. Cool to lukewarm before serving.


When I stirred, I couldn't get it completely smooth - a big clump of sugar stuck to the spoon, but I figured it would be okay. I was right.

Yummy bowl of caramel!

So then I ate my little snack of apples with caramel sauce - and was disappointed. The sauce was way too delicate for raw, tart apples. So I decided - I needed to make a pie.

I had a spare refrigerated crust that needed to be used. I know it's lazy, but I really didn't have 2 or 3 hours to make one, and I wanted a quick and easy pie.

Now here's the "first" part: I didn't use a recipe. Once again - I figured, I've been cooking/baking a lot, I've made apple pies before, how hard can it be? So I made a pie (but not the crust) from scratch.

I used about 4 apples, thinly sliced, and put them in the crust. Dumbly, I didn't think to add the sugar and spices before, so I just sort of mixed it all up in the crust before baking it. I used probably 1/2 c. sugar, maybe a tsp. of cinnamon, maybe more, and a shake or two of nutmeg. Then I cut up some butter and dotted it all over the apples. I baked it (I think) at like 375 for about 30 minutes or so? I honestly don't remember.

And here it is:


By all means, it was not the best apple pie I've ever had. It was incredibly simple, and could have been a little wetter. But it was PERFECT with the caramel sauce. The simplicity of the pie was perfect with the sweetness of the sauce, and it was a delightful little snack. And, I was pretty proud of myself for not using a recipe.

I'm getting braver in the kitchen. It's a bit scary sometimes, and I get nervous before seeing (and tasting) the final product. But I'm growing and stretching and usually the food is good and we are pleased. And it makes me happy :)

Wednesday, October 13, 2010

Homemade Cinnamon Rolls!

The sweet potato ravioli is put on hold until Friday, because Kelly and Colton are at a Bob Dylan concert tonight, and couldn't come for dinner.

But, I did make cinnamon rolls today for the first time. They were a success! My poor, poor hubby is having a TON of major dental work done bright and early tomorrow at 7am, and they said he needed to eat beforehand. I'm well aware that a big sugary breakfast isn't quite what they meant, but I feel sorry for him (he probably won't be able to eat "real" food for a while), and he'll be more likely to eat something yummy like this early in the morning than something healthy. (And maybe I can get him to eat an egg as well...)

Anyway, I was going to use the recipe on the Pioneer Woman's website, until I looked it up and realized that it makes SEVEN pans of rolls. Seven! We don't need that many, and I don't have enough freezer space either ... oh well, maybe at the holidays I can make them as gifts.

So, it was off to Epicurious for some recipe-searching (oh, how I love that website! Thanks, Lissa and Mel!), and here's what I found:

(Apologies for not many pictures, but it's hard to cook with a puppy and make pictures at the same time!)

Cinnamon Rolls with Cream Cheese Glaze
For the dough:
1 cup whole milk
3 tablespoons unsalted butter
3 1/2 cups (or more) unbleached all purpose flour, divided
1/2 cup sugar 
1 large egg
2 1/4 teaspoons rapid-rise yeast (from 2 envelopes yeast) - NOTE: Fleishman yeast packets are 2 1/4 tsp. per packet, so you only need one if you're using that brand
1 teaspoon salt
Nonstick vegetable oil spray 
For the filling:
3/4 cup (packed) golden brown sugar
2 tablespoons ground cinnamon
1/4 cup (1/2 stick) unsalted butter, room temperature
For the glaze:
4 ounces cream cheese, room temperature
1 cup powdered sugar
1/4 cup (1/2 stick) unsalted butter, room temperature
1/2 teaspoon vanilla extract


For dough:
Combine milk and butter in glass measuring cup. Microwave on high until butter melts and mixture is just warmed to 120°F to 130°F, 30 to 45 seconds. (You'll want that butter to be at room temp - learn from my mistake, and don't use cold butter for that step.) Pour into bowl of stand mixer fitted with paddle attachment. Add 1 cup flour, sugar, egg, yeast, and salt. Beat on low speed 3 minutes, stopping occasionally to scrape down sides of bowl. Add 2 1/2 cups flour. Beat on low until flour is absorbed and dough is sticky, scraping down sides of bowl. If dough is very sticky, add more flour by tablespoonfuls until dough begins to form ball and pulls away from sides of bowl. (I probably added 3 more Tbsp?)


Turn dough out onto lightly floured work surface. Knead until smooth and elastic, adding more flour if sticky, about 8 minutes. Form into ball. 


Lightly oil large bowl with nonstick spray. Transfer dough to bowl, turning to coat. 


Cover bowl with plastic wrap, then kitchen towel. Let dough rise in warm draft-free area until doubled in volume, about 2 hours.  (And here's where my problem started: the dough wasn't rising! I don't know if it was my yeast, or what, but it didn't rise hardly AT ALL.)


For filling:
Mix brown sugar and cinnamon in medium bowl.
Punch down dough. Transfer to floured work surface. Roll out to 15x11-inch rectangle. Spread butter over dough, leaving 1/2-inch border. Sprinkle cinnamon sugar evenly over butter. (Sometimes I get overwhelmed with the cinnamon, so I used less than this recipe calls for.) Starting at 1 long side, roll dough into log, pinching gently to keep it rolled up. With seam side down, cut dough crosswise with thin sharp knife into 18 equal slices (each about 1/2 to 3/4 inch wide).
Spray two 9-inch square glass baking dishes with nonstick spray. Divide rolls between baking dishes, arranging cut side up (there will be almost no space between rolls). (Haha. Once again - my dough didn't rise.)


Cover baking dishes with plastic wrap, then kitchen towel. Let dough rise in warm draft-free area until almost doubled in volume, 40 to 45 minutes. (Okay, here was the next problem. See the above picture? That was before rising. These are after rising 45 minutes. I don't think they rose a milimeter.)


Position rack in center of oven and preheat to 375°F. Bake rolls until tops are golden, about 20 minutes. Remove from oven and invert immediately onto rack. Cool 10 minutes. Turn rolls right side up. (I forged on and baked them anyway, and you know what? They rose a bit during baking, and even though they're small, they still taste great!!)


For glaze:
Combine cream cheese, powdered sugar, butter, and vanilla in medium bowl. Using electric mixer, beat until smooth. Spread glaze on rolls. Serve warm or at room temperature.

These are delicious, despite the lack of rising. I'm going to make them again sometime (they're pretty easy, actually), with maybe some fresher yeast? They're good regardless though :)

Hope you all enjoy! And thanks to Epicurious for such amazingly yummy recipes :)

Wednesday, June 30, 2010

Strawberry Cake with Cream Cheese Icing

As I write this, I'm eating a second piece of this cake. It is good. Spoiling my dinner completely, but good.

I made this cake as a sort-of going away/I'm-being-really-really-nice-to-you-because-you're-leaving-soon gift for Mark. On Saturday, he's heading over to Georgia to his parents' house, where he'll spend a couple days, then depart on an overseas mission trip as... get this... a CHAPERON. Are we really old enough to be chaperons? Yeesh.

Anyway, he'll be gone a while, which makes me sad, so I'm doing things to make us both feel better. Like baking this cake...

Anyway, kudos to Whole Foods for the Strawberry Cake recipe! I was looking for one with actual strawberries, not strawberry Jello powder. And I found one! Here we go...

You're gonna need...

2 c. flour
1 c. sugar
1 Tbsp. baking powder
1 tsp. salt
4 eggs
1 1/2 sticks unsalted butter, melted
1 c. strawberry puree
1/2 c. milk

First, preheat your oven to 350 degrees. Then prep your pans, however you like to do 'em. Then, whisk all your dry ingredients (the flour, sugar, baking powder, and salt) in a big bowl. Like so:


Then beat all your wet ingredients together in your mixer (or a separate bowl, using a hand mixer.) Like so:

(I know, looks gross, right?)

Lucille, in action!


Then, after all that's been beaten into a frenzy, you're gonna add the wet ingredients to the dry ingredients, and whisk THEM together. Like so:


When it's ready, it's gonna look like this:


So then you pour all that into whatever you're baking it in. I used 2 round 9" cake pans. 


And then you patiently wait while it bakes for 30-35 minutes.

An excellent while-you-wait activity? Lick the bowl!!!


And then proceed to go insane from the heavenly smells coming from your oven. I swear, this batter smells like pure BUTTER while it's baking.

And then, DING, it's done!


Isn't this pretty?


Goodness, I love to bake.
Okay, so then you've got to let those cakes cool. While I was waiting, I made cheesy zucchini frittata for lunch. It'll be another post :)

Then, once those cakes are cool, time to make the icing!!

Keep in mind: this cake was made for my husband, who loves cheese. I swear, if I'd let him, he would LIVE on cheese. So I made the icing very, very cream chees-y. If you want your icing to taste more like sugar than cream cheese, don't use this one. (Or, do, and just cut the cream cheese in half.)

Here's what I did:

Cream 1 stick (1/2 cup) butter and 2 8-oz. packets of cream cheese really really well.


Then add some vanilla. I used whatever was left in my bottle ... probably somewhere between 1 and 2 tsp. 


Cream that together.

(I love my mixer and her action shots!)


Then add confectioner's sugar - the original recipe I was using called for 2 cups, but I upped it to three so it'd be a bit sweeter.


Then mix all of THAT together, and ice and decorate your cake!!


Another helpful hint: this icing is really creamy. REALLY. It would be next-to-impossible to pipe with. So if you're loving a piped look, you probably want to go with Royal icing to do your pipe work. I personally thought the strawberries were just as good, even though I LOVE a piped cake :)

And then ... eat it!!


(Why yes, we are pigs! However could you tell?)

Happy baking, everyone!

Tuesday, June 29, 2010

Ina Garten's Blueberry Coffee Cake Muffins

I got up at 5am to make these bad boys for my co-workers (and my hubby) the other day. In my sleepy stupor, I was lucky to include all the ingredients, let alone pictures. I'll let the "official" Barefoot Contessa Photos be enough...

(source found here)

I don't claim that they're healthy or anything, but man, they sure are good. I probably ate 5 in one day.

Here's the recipe. It says it makes 16 muffins, but I managed to get 24 somehow. Anyway ... you NEED to go and make these. Right now.

Ina Garten's Blueberry Coffee Cake Muffins
 You'll need:
12 tablespoons (1 1/2 sticks) unsalted butter, at room temperature
1 1/2 cups sugar
3 extra-large eggs, at room temperature
1 1/2 teaspoons pure vanilla extract
8 ounces (about 1 cup) sour cream
1/4 cup milk
2 1/2 cups all-purpose flour
2 teaspoons baking powder
1/2 teaspoon baking soda
1/2 teaspoon kosher salt
2 half-pints fresh blueberries, picked through for stems

To make:
Preheat the oven to 350 degrees F. Place 16 paper liners in muffin pans.
In the bowl of an electric mixer fitted with the paddle attachment, cream the butter and sugar until light and fluffy, about 5 minutes. With the mixer on low speed, add the eggs 1 at a time, then add the vanilla, sour cream, and milk. In a separate bowl, sift together the flour, baking powder, baking soda, and salt. With the mixer on low speed add the flour mixture to the batter and beat until just mixed. Fold in the blueberries with a spatula and be sure the batter is completely mixed.
Scoop the batter into the prepared muffin pans, filling each cup just over the top, and bake for 25 to 30 minutes, until the muffins are lightly browned on top and a cake tester comes out clean.

They are so, so delightful. Imagine these with fresh-squeezed orange juice and some scrambled eggs ... yum yum yum!!

Thursday, June 24, 2010

Orange Bran Flax Muffins!

These are about the healthiest muffins on the planet. They are so full of bran-y flax-y fiber-y goodness you won't know what to do with yourself! And they taste pretty good, too :)

You're going to need:
1 1/2 c. oat bran
1 c. all-purpose flour
1 c. ground flaxseed
1 c. wheat bran
1 Tbsp. baking powder
1/2 tsp. salt
2 oranges, quartered and seeded
1 c. brown sugar
1 c. buttermilk
1/2 c. canola oil
2 eggs
1 tsp. baking soda
1 1/2 c. golden raisins (I left those out of my muffins, cause I'm not a fan of raisins. I wish I had some nuts to add, though.)

First, preheat the oven to 375. Line or spray your muffin tins (you're going to need 2 12-cup tins - this recipe makes 24 muffins!)
In a large bowl, combine:

oat bran,

flour,

flaxseed,

wheat bran,

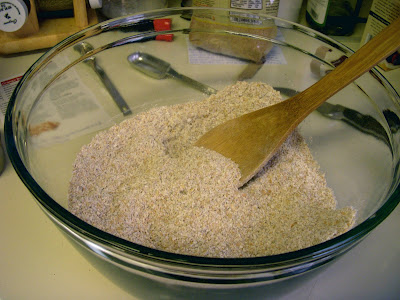
baking powder, and salt. Mix well and set aside.

Then, in a blender or food processor (oh my GOSH I want a food processor), combine:
oranges,

(and I hit the pulse button a couple of times so there would be more room)

brown sugar (I ran out, so I used 1/2 c. brown sugar and 1/2 c. white sugar)

buttermilk, oil, eggs, and baking soda. 

Blend well.

Pour orange mixture into dry ingredients. Mix until well blended. Stir in raisins (if you're using them. Or nuts. Or whatever else you decide would taste good.)

Then you just divide the batter into the muffin tins. 

(And I put some rolled oats on top of mine, cause I think it's pretty.)

Then you'll bake them at 375 degrees for 18-20 minutes. And voila!

Such healthy little muffins ... and they'll last us FOREVER! (It will take nearly two weeks for us to eat up 24 muffins!)

And, for those who are interested, here's the nutritional info:
Per muffin:
186 calories, 4g. protein, 30 g. carbs, 8 g. fat (about 1/2 of that is alpha-linolenic acid, the super-healthy kind of fat), 1 g. saturated fat, 18 mg. cholesterol, 3 g. fiber, 140 mg. sodium, and 4 g. flaxseed.

I would sing the praises of flaxseed all the livelong day if I could. I love that stuff. My body really loves that stuff. It is very, very good for you. If you aren't eating it, you should be! (And these muffins are a great way to start.)